Tuesday, August 14, 2012

Tutorial Tuesday: How to pack for a wedding like a champ.

If there is one thing that I am becoming entirely proficient in, is packing.

I deserve an honorary Ph.D in packing from the finest of nomad universities. Packing up an apartment, weekend trips for a bridal shower, week-long trips with a gaggle of high schoolers, extended weekends to weddings.

Let's just say my grades in unpacking come in a little bit lower than average. But packing? Let's talk about that.

Packing for a wedding requires a very delicate balance. Especially if you're a member of the wedding party. A lot of these are tailored to the bridesmaids.

Before packing you have to think:
  • How many dress-code appropriate outfits do you need?
  • Are you going to be huffing flowers to the venue the morning of the wedding?
  • How many shoe changes do you anticipate (this is the most important, of course) ?
  • How much do you plan on partying? (this plays into your shoe choice)
This weekend, we're traveling to a 5-day wedding extravaganza.

As far as events, we have a rehearsal dinner and a brunch--2 semi-casual dresses, 2 pairs of heels.


Then of course, there's being a brideslave bridesmaid: 2 changes of clothes that can get dirty for every day of 'work'--and flip flops. Lots of flip flops.


Then, the main event. All day, you want to dress like the photographer is there. So yeah, you're wearing cute yoga pants + cute top while you get ready. Then, you've got your dress for the main event, and three pairs of shoes. Seriously. Two heels (heels can play double duty with your rehearsal/brunch pumps, but not necessary. Girls need options.) One cute flip flops. Seriously.

Finally, we have the backup. The cosmetics, the toiletries and the first aid kit. Bring a ton of makeup, not because you'll use it, but because someone else might need it. Part of the fun of getting ready for a wedding is covering the bathroom sink with 90 variations of dark brown eyeshadow. Hair spray: two bottles.  Bring every hair electronic you have--straightener, good curling iron, and a set of hot rollers are a must for members of the bridal party. You've got a lot of pictures to smile for, no excuse for crazy hair.

These are my go-to products to prepare for a wedding.
Mac Studio Finish Concealer here
St. Tropez self-tanner and skin illuminator (looks awesome in pics) here and here
Yes to Cucumbers Soothing Eye Gel here
Urban Decay Eyeshadow Primer Potion here


Bring extra of everything. Extra shampoo, extra soap, extra razors, extra everything. You never know what the Bride might need, and the worst thing is for everyone to scramble. If you have it, bring it.

Then, there's the first aid kit. Stock up on the standards: bandaids, tylenol, q-tips, kleenex, neosporin, clear nail polish, a sewing kit and tons of double sided tape. Just bring it all.

There you have it, all the tools to be an expert-nomad-bridesmaid. To the weekend!

[Programming note: Onethingoneday is going on a break during this wedding until Tuesday. I'll catch you up on all the details then! It's going to be absolutely beautiful!]


Monday, August 13, 2012

Olympic-sized blues

The Olympics have come and gone and left an Olympic-sized hole in my heart that can only be filled every 2 - 2.5 years. Wah womp.

Last night's Closing Ceremonies were pretty...weirdawesome. They started out really weird, and ended really awesome.

Like this part:

Sorry for the crappy quality--NBC doesn't like to share.

But honestly, the David Bowie part was so weird. I started out excited that maybe he was going to be there, but then it was just this weird model thing. Anyone else catch Ryan Seacrest trying to cover up the fact that he didn't know any of the 'famous British models' besides Kate Moss and Naomi Campbell?

If you missed last night's ceremony, Buzz Feed did a pretty awesome job of summing it up (animated GIFs and all. )

Anyway...

Today was definitely a 'let's finish this' day. I finished Emily's guestbook, a special surprise for Emily's wedding, and FINALLY unpacked my closet. 

And...exhale. 

Today was a total production day in the Reese Household. Pictures were framed. Presents were wrapped. A top-secret project was finished. Self-tanner was heavily applied. I am totally excited about this weekend and the upcoming nuptials of Emily and Alex.

This brings me to one of my favorite parts of going to weddings are getting the gift. I love buying people presents. I love making people presents. I love presents. Love love love.

Wedding gifts come in all shapes, sizes and price ranges. You want to give a gift that has utility, a gift that will last, and a gift that will be truly special to the Bride and Groom.

But, let's be honest--we all have different budgets and price ranges. Here's three great gifts in three price ranges [all with bonus DIY twists]:

$10 - $25: Cloth Napkins

$20 for set of 4 from West Elm
If you want to add a little DIY Twist, do my favorite bridal shower gift: buy nice solid-colored napkins and add a pop of metallic fabric paint. A step-by-step right here.

$26-$75: A fondue pot.

$50 on sale from Macy's

OK, don't laugh. We have a BLAST with our electric fondue. During the winter we use it constantly. It's perfect for entertaining, perfect for breaking-the-ice with newer friends, and there is nothing better than dipping carbs into hot cheese. Seriously. And plus, maybe the happy couple will invite you over for some fundoo?

Want to add a DIY/Personal twist? Load the box up with a home-spun recipe list of all your favorite fondues. A super cute template for recipe cards can be found here (the website is in Norwegian...I think. But the download link is about half way down the page in bold.)

$76 - $125: Just go to Tiffany's

Woven cylinder vase, $75 from Tiffany's

Getting something in one of those little blue boxes tied with the white ribbon just makes you feel special. Super special. Registering for a crystal bowl or an expensive vase seemed so silly last year when Ben and I were choosing things for our new home. But you know what? It totally makes sense. That expensive crystal vase or fancy bowl will always remind you of your wedding day, and how special you felt. Surprisingly enough, Tiffany's has some semi-affordable crystal wares, most under $150. Not cheap, but it's a special occasion for a very special couple.

Want to add a DIY/personal twist? Put a little note or a favorite poem inside the box. Go crazy at paper-source with specialty papers!

Do you have a go-to wedding gift? 

Sunday, August 12, 2012

Taco Night!

For the past month or so, we've been watching movies with a pretty consistent bunch of people on a weekly basis.

Last week, we made it official. We made a Facebook group. 

Movie Night @ the Reese's is a weekly celebration of cinema and food. Last week we saw The Dark Knight Rises. It was so intense we had to sprint over to Hall Street for happy hour. Too many questions.

Naturally, we sought answers to our 'what the heck?' questions from seeing DKR, and watched Batman Begins this week. 

Also, now we can finally sleep at night. 

Last night we did a taco bar--it was awesome! It was also a totally Pinterest-laced event for me. 

I made pulled pork/carnitas via this pin (recipe is from Budget Bytes)

This picture is from Budget Bytes--I forgot to take pictures of this before it was devoured. 
But, I didn't stop there. I made homemade taco shells via this pin [cupcake pan shells, anyone?] 


It didn't stop there--I made baked tortilla chips using a similar technique as above, sans cupcake pan.


Our awesome guests filled out the rest of the taco bar with awesome toppings. Winco had Jarritos + Corona on sale...soo...naturally...


For those of you that saw Batman Begins circa 2006ish--I highly recommend you revisit it after seeing the other two installments. While it isn't the strongest of the trilogy, it definitely sets up the story lines for The Dark Knight and The Dark Knight Rises. It also makes No. 3 an even better movie--if that's possible. 

All and all--this weekend was a huge success. I fell in love with our house [again], had an awesome crew over for an awesome movie, and spent today wine tasting/food tasting at The Bite of Oregon with my two favorite guys. 

Two thumbs, way up. 

Friday, August 10, 2012

Fal-awesome.

I love trying different ethnic foods. I'm generally really adventurous (less so now that I am allergic to everything...) but I never tried Falafel.

My sister constantly (without ceasing) talks about how amazing the Falafel was in Palestine--I probably won't make it to the Holy Land in the new future, but I do live pretty close to a Trader Joes. (heat-and-eat Falafel in the freezer section)


Man, it was amazing. Seriously.

I don't know the proper protocol for falafel, but Ben and I topped our flatbread with hummus, tzaziki, feta, cucumber and tomato.It was perfect, took about 4 seconds to prepare, and tasted like heaven--or maybe the Holy Land.

Next step: make it from scratch.


Thursday, August 9, 2012

The Census of Weddings

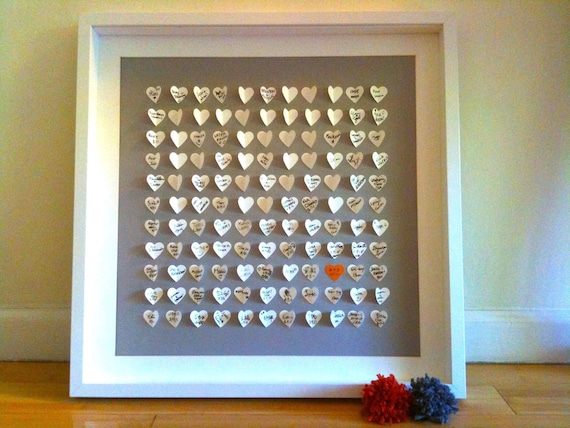
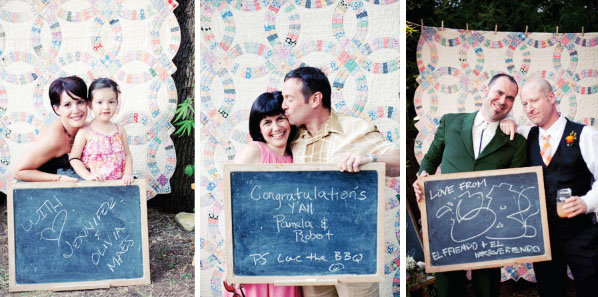
Guestbooks. They're super necessary. Also--super hilarious.

Here are our guestbook(s) from the wedding:

This is the 'before'

Here's the after:


So, I guess I didn't have enough strings. 

One of my behind-the-scenes projects for this week is creating a guestbook for my bff/sil Emily. I'm drawing this one [sans-computer] and I can't wait to show you.

But, in the meantime, a quick roundup of guestbooks that don't involve a ribbon-covered book:

here
here
here
here

here


What are your ideas for recording your wedding guests?


Wednesday, August 8, 2012

Uh, don't you mean Septemberfest?

Phew. Is it really only Wednesday?

I'm working on a couple things behind the scenes this week...But, since I'm such a 'planner,' I thought I'd show you some of my inspiration for something coming up on the horizon: Oktoberfest.

Ben and I are planning on hosting a huge Oktoberfest party this year. So excited.

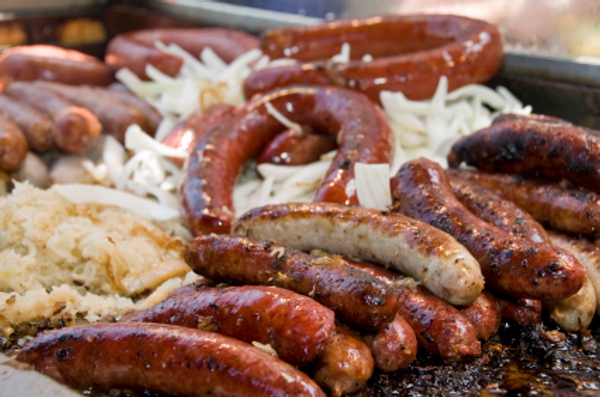
But - to be honest - I have no idea what goes into an Oktoberfest Party other than beer and sausages. Oh, lederhosen. Lots of that.

Today I started an inspiration board for the party, here it goes:


here
here

Personalized Pint Glasses for favors, here

Lots of this, here
and finally, it wouldn't be a German celebration without...


Tuesday, August 7, 2012

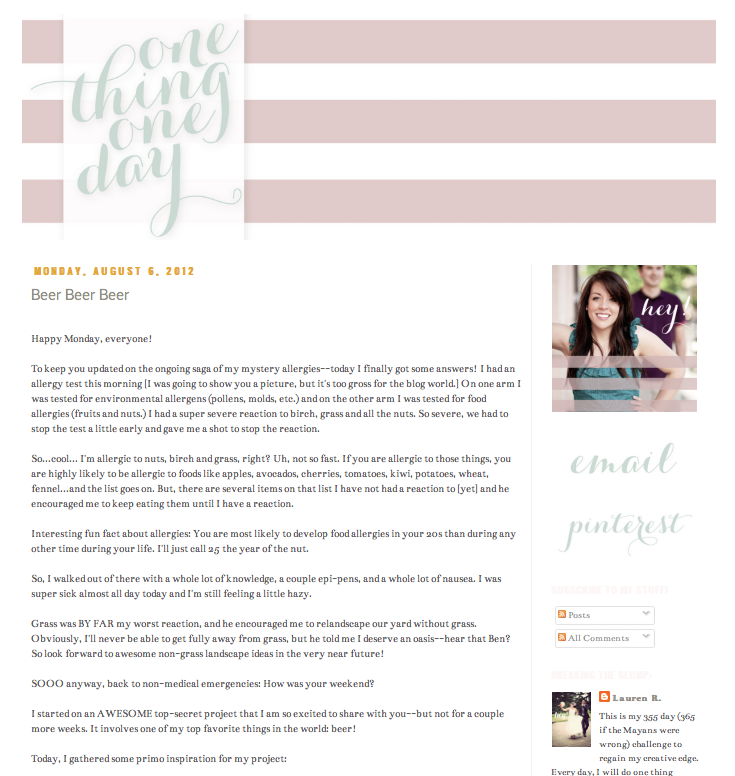
Tutorial Tuesday!: Creating your very own Blogger Design!

You may have noticed that it is August the seventh. You may have also noticed I have yet to update the blog design.

OK, maybe you didn't notice--but I did this [sort of] on purpose! I've been meaning to give a tutorial for how I redesign my blog every month, and I wanted to show you as I was actually designing one...

So here we go! Again, no fancy program needed. It is easier if you have photoshop or illustrator, but you can use MS Paint, PowerPoint, or a billion other programs.

I'll go through this in three parts: [1] The Banner [2] The Background+Buttons [3]The Guts.

Part One: The Banner

Make your file. Size should be 1124 px x 360ish px (height can change, but 1124 px is the max width.)  Quick tip on picking your size: Think 'above the fold' - the space on a newspaper that is above the fold on the front page is most likely to be read, and [most importantly] will draw in your readers. So, if your top banner is too big, they won't see your content--just your banner.


Make sure you set your file in RGB [designer-speak for Red Green Blue--this is the color format most monitors are set up to use. Not to be confused with CMYK used in Printers]

Start coloring. Do whatever you want. Make sure to take screen color/light into consideration. Also think about those who are reading it on their smart phones--little bitty type is beautiful but not practical for web. Also, make sure your colors are going to pop on an illuminated screen. Don't put white lettering over 9pt type.


So...I guess what I'm saying is do whatever you want, as long as it isn't ugly.

So now we have our banner. Awesome! Write down your web-color codes (usually can find them if you double click on your color swatch. Keep that post-it close--you'll need it a little bit later.


Save your banner as a Jpeg or PNG file. Since I do a lot of illustrations and type, I typically go for a PNG file. It's called a 'lossless' file, meaning it keeps a lot of the color/line information when it is compressed. Jpeg works better if you are putting in an actual photograph. Otherwise, go for the PNG.


We're ready to upload it onto the blog.

On Blogger, go to the Layout Tab. Looks like this:

Edit the bar that holds the banner (long thing on the top that says One Thing. One Day. Every D...)


Save that, then preview your blog to make sure it's lookin' good.

Now, on to the background...


Part Two: The Background

Design-wise, this is the part you want to be very careful of. Your background falls behind the area that your readers are...well...reading. You don't want to do anything too distracting, and nothing that will clash too much with your content.

This is why...most of the time...I don't do anything for my background besides a solid white.

This month, I'm sticking with solid white.

But, I do love me some buttons.

If you have Illustrator, it's best to do this with multiple art boards.

Size for these are up to you, but max width is 260 pixels. Again, your content is the most important...so keep that in mind when determining your size.


Want to add more buttons to your blogger? Super easy. Just play around with the Layout tab [add gadget...] until you get something you like.

So, start coloring.

Here's what I made:


Save your file the same way you saved your background, and upload the same way as well.

Right now, this is what we have:
ooo...yellow from last month. oooo.

TO THE GUTS!

Part Three: The Guts.

This is the most annoying part. We start playing around with the guts of blogger.

This is the Template Tab. It's the most annoying of all tabs.


Click on Customize.

Changing the font colors is under Advanced. I know. So stupid. 

This is where writing down those color numbers comes in handy. Play around with these tabs until you have your color combo right. Fortunately, Blogger puts a nasty red dotted line around everything you are changing.


So, play around with it until you like it.

Again, you can do all of this in MS Paint or 90 other easy/free programs. I use Adobe Illustrator because I know how to use it, and I spent a boat load of money on it a couple years ago.

What do you think of this month's design? I call it Princess Minimalist.