Today, we're talking earmuffs:
Scroll to about :45 for the good part
This girl [delia creates] is the Pinterest guru of all things earmuffs. So naturally, I ran out to the fabric store, bought some fleece, and ended up with last week's horrible
Today's project also involves a sewing machine, but you can do without. Just go to the store and buy a plain fleece headband and scroll down until I start making a cute bow.
What you need:
1/2 Yard of Fleece (this will make about 5 or 6 earmuffs with extra for decoration)
1 Button
1 Hair Tie
Sewing machine, needle, thread, the usual suspects....
[Step One] Now, time to cut out your shape. I measured my head from my forehead to the brain stem [too anatomic? The corner of your neck and noggin.] This was about 25 inches--I have a huge head. So I wanted to make sure my 'finished' length [length after sewing the seams] was at least 25 inches. I grabbed a piece of big paper and measured 13 inches for the length. I want the thickest part to have a width of 5.5" and the thinnest part to have a width of 3.5 inches. So I made some measurements and it came out looking like this:
 |
| When I figure out how, I'll upload a pattern for you to download. But you kinda get the picture here. |
So I put the thickest end on the fold of my fleece and cut around the edges. My cut piece looks like this:
 |
| I'm horrible at cutting, which is why you see that bowed edge on the bottom. Yours will not have that because you probably learned how to use scissors properly in Kindergarden. |
 |
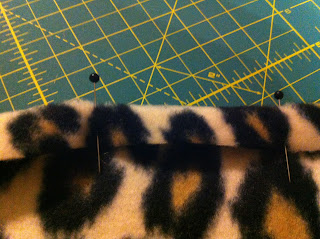
| Pins! |
YOU DID IT! Now, same thing, but on the ends:
YES!! We have a headband. Now, for the super fun part. Measure how big you want your beautiful bow to be. I decided I wanted mine to be the length of my pointer finger.
Cut a piece of fleece to your desired length and width. For a bow, I picked a piece that was about 4" wide and 12 inches long.
Fold the two ends to the middle [I believe this is called a barn door fold]
And bunch it together until you have something that looks like a cute bow:
Hand-sew the bow together. Start at the top of the bunch and straight down to the bottom. Do this really tightly so your bow keeps shape.
Now take a little scrap of fleece [1" wide or so] and wrap it around the middle. Sew the back together. Now you have a bow!
Take your pretty bow, and attach it to your headband. Put it wherever you want. I wanted mine to be a little off to the side, so I put the center about 8 inches from the end.
 |
| Make sure to sew each little corner of the bow in addition to the center knot. This will make sure you won't have floppy ears hanging off your cute earmuff. |
I have no clue how to sew a button. Zero clues ever. So I decided to attach this one similar to how we did our coffee sleeves a couple weeks ago.
Sew your cute button about 1.5" inches from the end.
Cut a hair-tie in half and sew that into the other end:
I made a million of these this weekend. Once I got the hang of sewing a stretchier fabric [like fleece] I was on a role. I made a yellow one with a double-bow [very similar to the one Delia made on her blog] that was a huge hit at the High School Youth Gathering I volunteered at this weekend:
 |
| This is my mentee, Luke. He wore this all weekend. |
I want to offer up a little help for anyone in the Portland Area that is intimidated with sewing: I will help you! Contact me via my email [on the side of the page] and we can set up a time for us to sew together! I'm no expert, but I'm a big believer in getting over the initial shock of using a sewing machine.


No comments:
Post a Comment